
Microsoft has released its latest operating system, Windows 11, which promises new and improved features for its users. If you’re planning to upgrade your current system to Windows 11, you can do so easily using a flashdisk.
In this article, we will guide you on how to install Windows 11 using a flashdisk step by step.
How to Install Windows 11
Step 1: Check your system requirements
If you’re planning to upgrade to Windows 11, it’s important to check whether your computer meets the minimum system requirements. Microsoft has updated the system requirements for Windows 11, and they are as follows:
- Processor: 1 gigahertz (GHz) or faster with 2 or more cores on a compatible 64-bit processor or System on a Chip (SoC)
- RAM: 4 gigabytes (GB) or more
- Storage: 64 GB or larger storage device (such as a hard drive or SSD)
- System firmware: UEFI, Secure Boot capable
- TPM: Trusted Platform Module (TPM) version 2.0
- Graphics card: DirectX 12 compatible graphics / WDDM 2.x
- Display: >9” with HD Resolution (720p)
Step 2: Download the Windows 11 ISO file
Once you have confirmed that your system meets the requirements for Windows 11, you can download the Windows 11 ISO file from Microsoft’s website. Make sure that you download the correct version of Windows 11 that matches your system’s architecture, either 32-bit or 64-bit.
Step 3: Create a bootable flashdisk
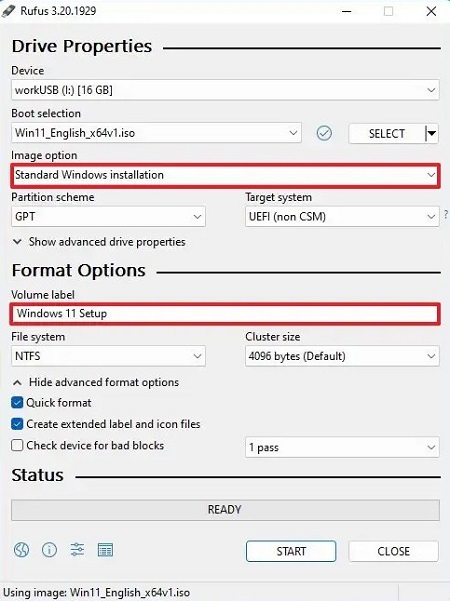
To install Windows 11 using a flashdisk, you need to create a bootable flashdisk first. There are several ways to do this, but the easiest way is to use the Rufus tool. Rufus is a free and open-source tool that allows you to create bootable flashdisks for various operating systems, including Windows.
To create a bootable flashdisk using Rufus, follow these steps:
- Connect the flashdisk to your computer
- Open the Rufus tool and select the flashdisk from the Device dropdown menu
- Under the Boot selection section, click the Select button and navigate to the Windows 11 ISO file that you downloaded earlier
- Under the Partition scheme section, select MBR if your system is using BIOS or UEFI-CSM mode.Select GPT if your system is using UEFI mode
- Under the File system section, select NTFS
- Click the Start button to begin the process of creating a bootable flashdisk
Step 4: Boot from the flashdisk
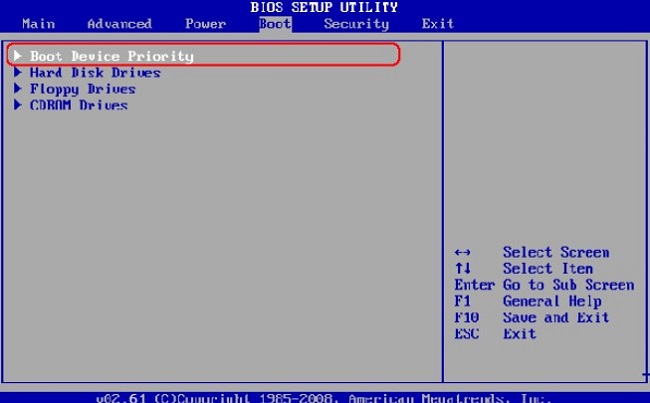
After creating the bootable flashdisk, you need to boot your system from the flashdisk. To do this, you need to change the boot order in your system’s BIOS settings. Here’s how:
- Restart your computer and press the key to access the BIOS settings. This key varies depending on your system’s manufacturer, but it is usually F2, F10, or Delete
- In the BIOS settings, navigate to the Boot tab
- Change the boot order so that the flashdisk is at the top of the list
- Save and exit the BIOS settings
- Your system will now boot from the flashdisk
Step 5: Install Windows 11
Once your system has booted from the flashdisk, you can now install Windows 11. Follow these steps to install Windows 11:
- Select your language, time, and keyboard preferences
- Click the Install Now button
- Enter your product key if prompted. If you don’t have a product key, you can skip this step
- Accept the license terms and click the Next button.
- Select the Custom installation option
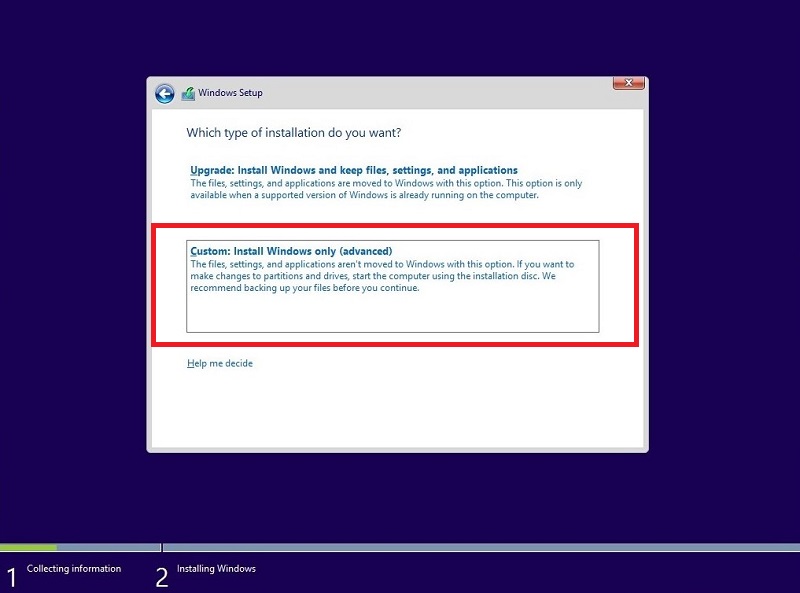
- Choose the partition where you want to install Windows 11
- Click the Next button to begin the installation process
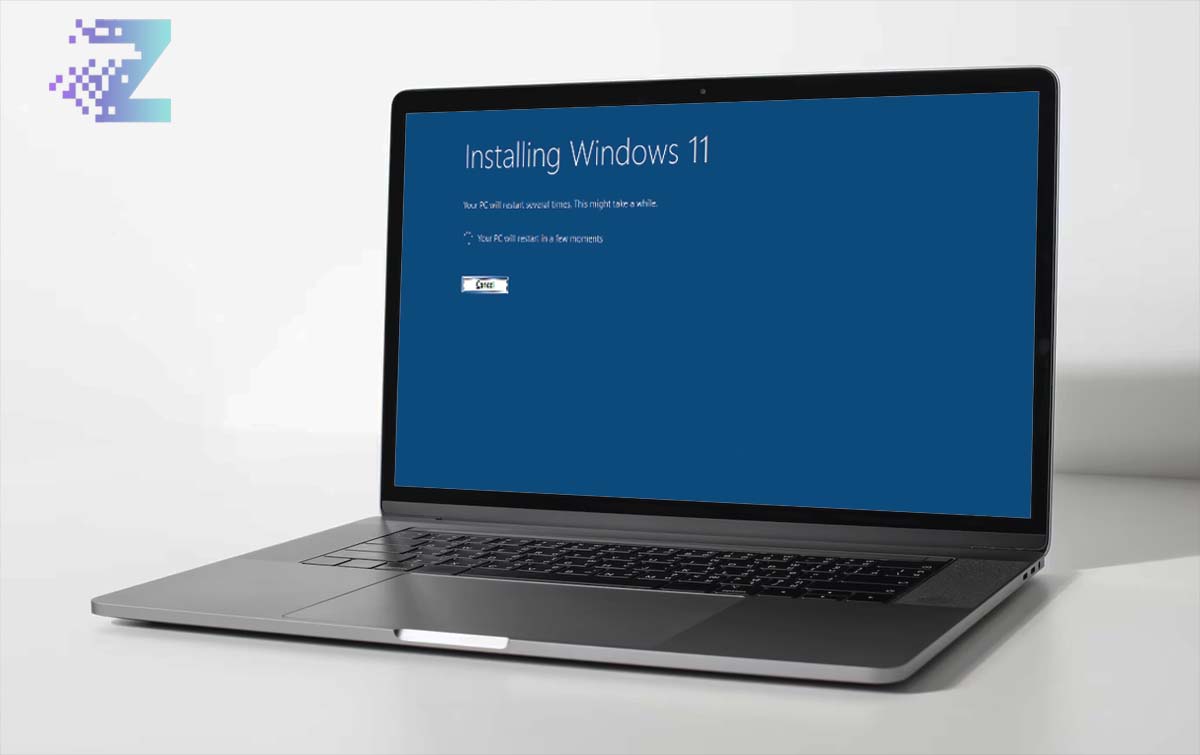
- Wait for the installation process to complete. This may take some time depending on your system’s hardware
- Once the installation process is complete, your system will restart
- Follow the on-screen instructions to complete the setup process
- Done!
Conclusion
In conclusion, installing Windows 11 using a flash drive can be a convenient and quick way to upgrade your operating system. By following the step-by-step guide we have provided, you can easily create a bootable flash drive and install Windows 11 on your computer.
It’s important to note that before attempting to install Windows 11, you should ensure that your computer meets the minimum system requirements. You should also backup your important files and data before proceeding with the installation.