
Windows 10 is the latest operating system from Microsoft, and it has a host of features and capabilities that can help you be more productive. Whether you use your computer for work, school, or personal use, there are a number of tips and tricks you can use to get things done faster and more efficiently. In this article, we’ll explore some of the most useful Windows tips and tricks.
Windows Tips and Tricks to Help You Get Things Done Faster
Use Virtual Desktops
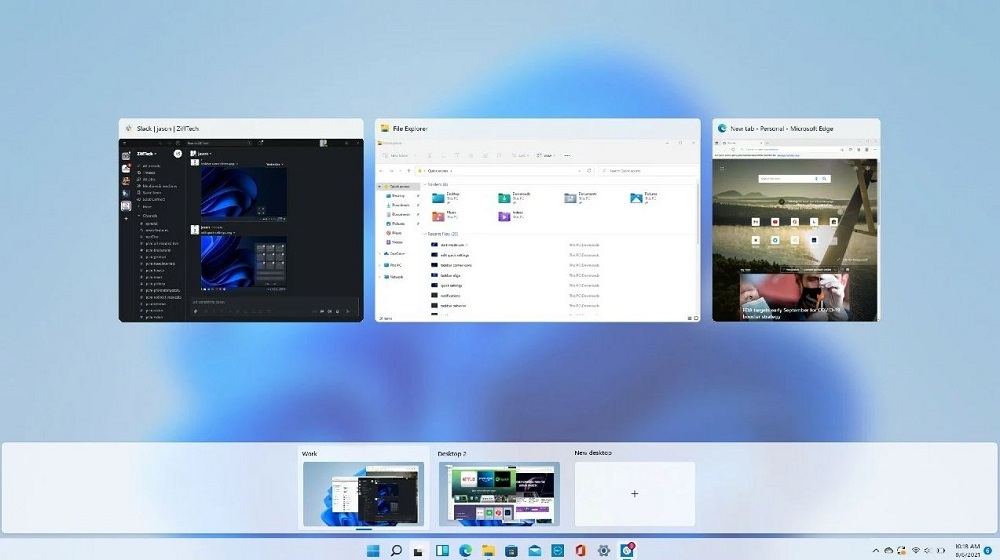
Virtual Desktops is a useful feature in Windows 10 that allows you to organize and manage multiple desktops on a single device. This feature enables you to work on multiple tasks without cluttering your screen, helping you to be more productive and efficient.
Here are some tips and tricks on how to use Virtual Desktops in Windows 10:
- Create a New Virtual Desktop: To create a new Virtual Desktop, click on the Task View icon in the taskbar or press the Windows key + Tab. Then, click on the “New Desktop” button at the top left corner of the screen.
- Switch between Virtual Desktops: To switch between Virtual Desktops, click on the Task View icon in the taskbar or press the Windows key + Tab. Then, click on the desktop you want to switch to.
- Move Windows between Virtual Desktops: To move a window from one Virtual Desktop to another, open Task View, click and hold the window you want to move, and drag it to the desired desktop.
- Close a Virtual Desktop: To close a Virtual Desktop, open Task View and hover your mouse over the desktop you want to close. Then, click on the “X” icon that appears in the top right corner of the desktop.
- Customize Virtual Desktops: To customize Virtual Desktops, open the Settings app and click on the “System” option. Then, click on the “Multitasking” option and select your preferred settings, such as whether new windows should open on the current desktop or a new desktop.
By using Virtual Desktops in Windows 10, you can keep your work organized and focused, making it easier to switch between tasks and stay productive. With these tips and tricks, you can maximize your use of this feature and get things done faster on your Windows device.
Use Keyboard Shortcuts
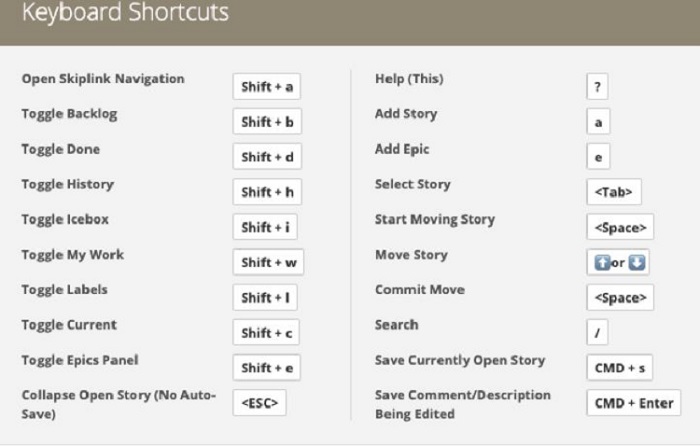
Keyboard shortcuts are a great way to save time and increase your productivity while using Windows. Here are some of the most useful keyboard shortcuts to help you get things done faster:
- Copy: To copy selected text or a file, press Ctrl + C
- Cut: To cut selected text or a file, press Ctrl + X
- Paste: To paste copied or cut text or a file, press Ctrl + V
- Undo: To undo the last action, press Ctrl + Z
- Redo: To redo the last action that was undone, press Ctrl + Y
- Save: To save the current document or file, press Ctrl + S
- Print: To print the current document or file, press Ctrl + P
- Open Task Manager: To open Task Manager, press Ctrl + Shift + Esc
- Switch between open windows: To switch between open windows, press Alt + Tab
- Lock the computer: To lock the computer, press Windows key + L
- Open File Explorer: To open File Explorer, press Windows key + E
- Take a screenshot: To take a screenshot of the entire screen, press Windows key + Print Screen. To take a screenshot of a specific window, press Alt + Print Screen
By using these keyboard shortcuts, you can navigate and perform tasks on your Windows device much more quickly and efficiently. Try incorporating these shortcuts into your daily routine and see how much time you can save!
Use the Start Menu
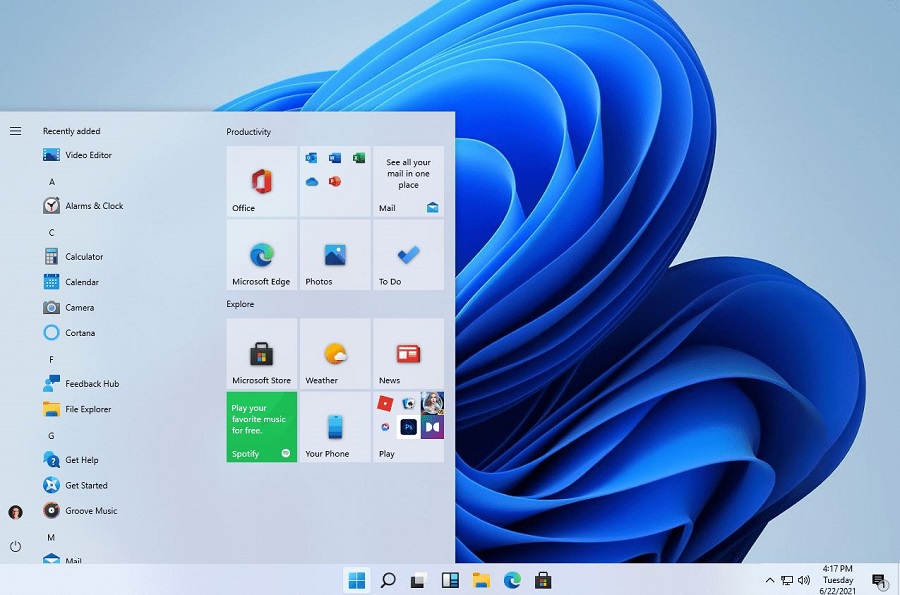
Customizing the Start Menu in Windows can help you access your favorite apps and settings quickly and easily. Here are some ways to customize your Start Menu:
- Resize the Start Menu: Hover your mouse over the edge of the Start Menu until the resize icon appears, then click and drag to make the Start Menu bigger or smaller
- Pin apps to the Start Menu: To pin an app to the Start Menu, right-click on the app in the Start Menu or search results, then select “Pin to Start”
- Unpin apps from the Start Menu: To unpin an app from the Start Menu, right-click on the app in the Start Menu and select “Unpin from Start”
- Group and organize app tiles: To group app tiles in the Start Menu, click and drag a tile to a new location. To create a new group, drag a tile to an empty space and give the group a name. To resize a group, hover over the group header and click and drag the resize icon
- Customize the Start Menu layout: To customize the layout of the Start Menu, right-click on the Start Menu and select “Settings” From there, you can choose to show or hide certain app suggestions, recent apps, and other options
- Personalize the Start Menu with a background: To add a background to your Start Menu, go to “Settings” > “Personalization” > “Start” and choose a background image
By customizing your Start Menu, you can make it work for you and access the apps and settings you need quickly and easily. Try these tips to make the most of your Start Menu!
Use Cortana
Cortana is Microsoft’s virtual assistant, and it can help you perform a wide range of tasks in Windows 10. You can use Cortana to set reminders, search the web, open apps, and more. To activate Cortana, click the search bar in the taskbar and follow the prompts to set it up.
Use File Explorer
File Explorer is the file management tool in Windows 10, and it can be used to navigate and manage your files and folders. You can use File Explorer to copy, move, delete, and rename files, as well as to create new folders and organize your files. You can also customize the File Explorer window to show the information you need, such as file size, date modified, and more.
Use Task Manager
Task Manager is a powerful tool in Windows 10 that can help you monitor and manage the processes and applications running on your computer. You can use Task Manager to close unresponsive applications, view CPU and memory usage, and more. To open Task Manager, press Ctrl + Shift + Esc on your keyboard.
Use Snipping Tool
Snipping Tool is a built-in tool in Windows 10 that allows you to capture screenshots of your computer screen. You can use Snipping Tool to capture a specific area of the screen or the entire screen, and then save the screenshot as an image file. To open Snipping Tool, search for it in the Start menu.
Conclusion
These are just a few of the many tips and tricks you can use to get things done faster in Windows 10. By using virtual desktops, keyboard shortcuts, the Start menu, Cortana, File Explorer, Task Manager, and Snipping Tool, you can be more productive and efficient with your computer. Experiment with these tools and features to find the ones that work.